


Using Skip Vias vs. Blind Vias to Build High Density Interconnect PCBs


All high-density PCBs rely on specific via styles to make connections into the inner layers without taking up space for routing. This is always driven by the components used in the PCB, namely fine-pitch BGAs with many high pin counts. One of the options for routing into inner layers as part of fanout routing is to use skip vias.
Type-I HDI stackups will include skip vias as part of their routing options in an attempt to avoid the use of buried core vias and stacked blind/buried vias. This could present a more reliable option than stacked vias, which could present a reliability challenge if the fabrication house is not experienced with stacked vias. In this article, I’ll run over when to use skip vias and how to ensure your skip via designs are reliable.
What Are Skip Vias vs. Blind Vias?
As I mentioned above, skip vias are a standardized feature in HDI PCBs, specifically in Type-I stackups (see the image below). Skip vias are essentially blind vias that “skip” a layer; instead of connecting from the surface to the next layer (L2), they skip down to the following layer (L3). The typical usage in a Type-I PCB is shown below.

Type-I HDI stackup
Depending on the thickness of the layers, skip vias could skip more than one layer, but the standard practice is to use them in the 2+N+2 configuration shown above. In any case, skip vias will not have a landing pad and annulus on the layer they are skpping, so in the above image the skip via will not have a landing pad on L2.
In this configuration, the skip via and the blind via could be placed with either standard drilling process:
- As mechanically drilled vias
- As laser-drilled microvias
Which process is used depends on the diameter of the drill hole, as is the case in any other vias used in HDI PCB design. Note that there is a bit of terminology to untangle: according to IPC, a “microvia” is any via that is 8 mil or smaller, regardless of how it is fabricated in a PCB layer.
When to Use Skip Vias vs. Blind Vias
Skip vias can be used instead of stacked blind-buried vias in a 2+N+2 stackup or a stackup with larger number of sequential laminations. The use of skip vias does not preclude the use of stacked blind-buried vias to reach between L1 and L3, but this should underscore the two main reasons we might want to use skip vias:
- Using skip vias eliminates buried vias from L2-L3, so it eliminates a drilling and plating step in the HDI stackup design
- Using skip vias eliminates a reliability problem present in stacked blind-buried vias; not all manufacturers can guarantee
- If you instead decide to stagger your blind and buried vias, they will take up more room; skip vias give the same layer transition but with more space available for routing
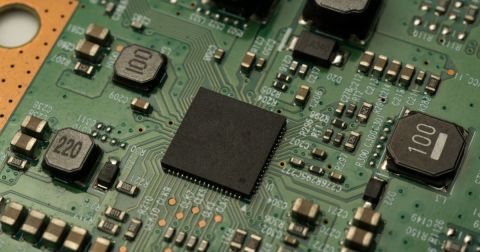
When look from the top side of the board, such as in the FPGA footprint shown below, you won’t notice any difference when skip vias are used. They provide the exact same function as a blind-buried stack.
These vias could be either skip vias or blind vias
In the example above, you can complete the fanout routing as normal while also eliminating a process step when building the HDI buildup layers. However, you will not be able to route from L3 to L2 directly except using a through-hole via. Therefore, if you want to get the most benefit from skip vias you will need to plan ahead so that L3->L2 and L2->L3 transitions are not needed in your routing.
HDI PCB Manufacturing With Skip Vias
Just as is the case with blind and buried vias, including microvias, a few simple DFM requirements are needed to ensure the fabricated structures are reliable.
- Drill depth allowance for your process – laser drilling requires smaller depth
- Aspect ratio for skip vias – Less than 1:1 aspect ratio ideal
- Via-in-pad with skip vias – Skip vias can be placed in-pad
- Filling and skip plating with skip vias – In used in-pad then consider fill and plating (VIPPO)
In terms of DFM, the first place to start building boards with skip vias is to select the skip via’s aspect ratio. The aspect ratio will determine the size of the pad and it depends on the thickness of the outer two laminate layers.

In some cases, the skip via hole diameter and pad might need to be a bit larger than a neighboring blind via hole diameter. This would ensure there is a large enough via diameter to stay within the aspect ratio requirement. On a fine-pitch BGA, this might limit the size of the hole and pad you can place on the skip via, especially if the dielectric layers are thick.

Before putting the board into manufacturing, make sure to speak with your manufacturer and verify that they can accommodate your HDI via requirements. HDI vias can be a source of latent failures, but a brief review of the stackup and via dimensions can lead to simple design modifications that can increase the reliability of the final product.
A great piece of printed circuit board PCB layout software like Altium makes it easy to layout your next high density design. The ActiveRoute tool and built-in CAD tools make it easy to customize your via parameters and route your signals around your PCB.

关于作者
Related Technical Documentation
相关资源
从设计到发布,全程无阻碍
- 让评审始终关联到正确的版本
- 减少交接中的混乱和返工
- 更早发现采购与发布风险
- 可独立工作,按需共享
开始使用
Thank you, you are now subscribed to updates.


 沪公网安备 31010502006411号